

“Discover the art of brewing coffee at home! With quality beans and basic tools, you can craft a delicious, satisfying cup. After a decade in the coffee industry, I’ve learned that sublime coffee doesn’t need expensive machines—just a little skill, care, and the joy of a simple brew.”
5 Steps to Brew Coffee at Home
Step-1 Defining a Budget for Coffee Gear
Setting a budget for your coffee gear is an essential first step in your brewing journey, especially if you’re just starting out. It’s easy to fall into the “just one more gadget” trap when exploring the world of coffee but remember, great coffee doesn’t require breaking the bank.
Start Small, Start Smart
Begin with affordable essentials that deliver quality results without unnecessary bells and whistles. For instance:
- Burr Grinder: A good grinder is the cornerstone of great coffee. Even an entry-level burr grinder is a huge step up from pre-ground coffee.
- Brewing Device: Depending on your preference, consider a French press, pour-over dripper, or even a basic drip coffee maker. These options are inexpensive and offer plenty of versatility.
- Gooseneck Kettle: If you’re exploring pour-over methods, a gooseneck kettle provides better control over water flow, but any kettle can work initially.
Upgrade as You Go
As you gain experience and refine your taste, you might want to explore higher-end gear to enhance your brewing process. Investing in items like a precision scale for consistent brewing ratios or a premium espresso machine makes more sense once you know what you enjoy most about coffee.
Avoid Impulse Buys
Stay focused on what will truly enhance your brewing experience. Before splurging on trendy gadgets or niche tools, ask yourself: Does this solve a problem or meet a need in my coffee-making process?
By defining your budget and starting with the basics, you’ll discover the joys of brewing at home while saving money for high-quality beans—a far better investment in crafting the perfect cup!
Step-2 Unlock the Secret to Better Coffee: Freshness & Roast Date
The magic of truly great coffee starts with fresh, flavorful beans. Here’s how to ensure every sip is an experience worth savoring:
- Check the Roast Date: Look for beans roasted within the past two weeks—they’re at their peak flavor! Your local roaster can be an incredible guide, offering recommendations based on your flavor preferences.
- Go Single-Origin for Unique Tastes: Single-origin beans allow you to explore specific regions’ distinct flavors, whether it’s fruity Ethiopian notes or nutty Brazilian tones.
- Choose a Medium Roast: For a balanced cup that celebrates the beans’ natural character, opt for a medium roast. Dark roasts can overpower unique flavors with bitter, smoky notes.
- Store Beans Like a Pro: Keep your beans in an airtight container, away from sunlight, to preserve their freshness longer.
- Grind Fresh for Every Brew: Grinding just before brewing unlocks maximum aroma and flavor, giving your coffee that “just made” taste every time.
Your coffee ritual deserves the best beans—small details like these make all the difference. Ready to elevate your morning cup? Start with freshness!
Step-3 Unlock the Flavor: Ensure Coffee Grind Consistency
Your grind size is the secret code to unlocking your coffee’s full potential! Achieving a consistent grind might sound technical, but it’s the key to balanced, flavorful coffee, whether you’re a casual sipper or a dedicated enthusiast.
- The Ideal Grind: For most brewing methods, aim for a uniform medium grind with a texture similar to kosher salt. This balance ensures an even extraction, bringing out the best in your beans.
- Grind Fresh: Grinding your beans just before brewing elevates flavor and aroma. Pre-ground coffee can go stale quickly, so keep your beans whole until you’re ready to brew.
- Blade Grinders vs. Burr Grinders: While blade grinders are tempting for their low price, they produce an uneven mix of fine particles and larger chunks, leading to inconsistent brewing. Burr grinders, on the other hand, crush beans between two abrasive surfaces, delivering uniform grounds perfect for precision brewing.
- Invest in Quality: A burr grinder is a game-changer for any coffee lover. It might be a little more upfront, but the improved flavor and consistency make it well worth the investment.
Even without fancy gear, consistency is within reach—and it makes all the difference. With the right grind, you’re just one step closer to brewing perfection!
Step-4 Select Your Brewing Methods
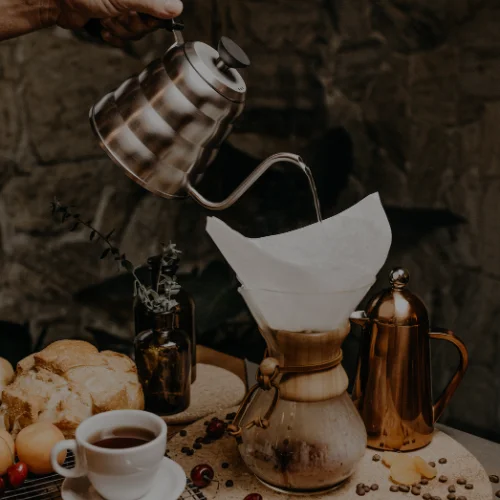
1. The Pour-Over
This is a classic method that uses a filter and a carafe. To make a pour-over coffee, you will need:
- A coffee filter
- A carafe
- A kettle
- Ground coffee
Instructions:
- Preheat your vessel with hot water
- Place the coffee filter in the carafe.
- Rinse the filter with hot water.
- Add ground coffee to the filter.
- bloom the grounds with a bit of water for 30 seconds
- Pour hot water over the coffee grounds, slowly and evenly (Practice your spiral pouring technique).
- Slowly pour in circular motions until you hit your desired volume
- Savor the mesmerizing bubbling and aroma
- Let the coffee steep for 4-5 minutes.
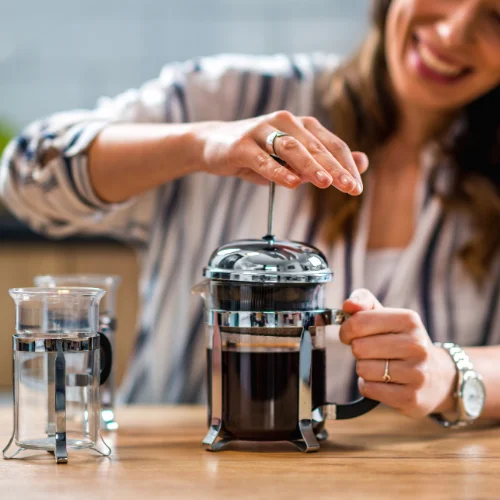
2. French Press
The French press is a basic and straightforward way of making a rich and fragrant cup of coffee. To make a French press coffee, you will need:
- A French press
- Ground coffee
- Hot water
Instructions:
- Preheat your vessel with hot water
- Add ground coffee
- Pour hot water over the coffee grounds and stir a bit
- Let the coffee steep for 4-5 minutes
- Place the plunger on top of the carafe, but don’t press down yet
- After 5 minutes slowly press down on the plunger
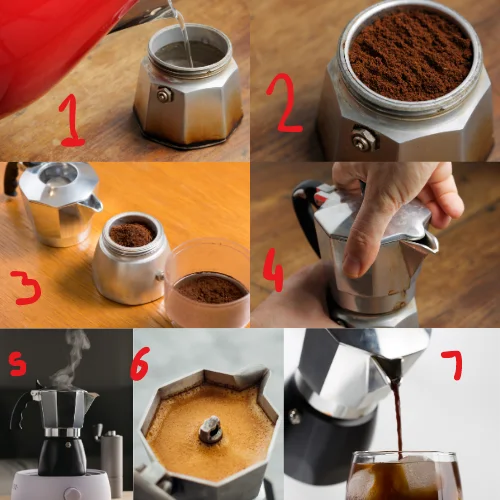
3. Stovetop Moka Pot
Who needs an espresso machine when you’ve got a trusty stovetop Moka pot? It’s like creating a tiny Italian coffee symphony on your stove. Fill the bottom with water, add ground coffee to the filter, and let the rich goodness percolate.
These recognizable little pots press hot water through the coffee grounds using steam pressure, yielding a potent, concentrated brew similar to espresso. Perfect for someone who craves a high level of intensity without complicated machinery. Your reputation in the kitchen has just increased greatly.
4. The Cold Brew Approach
A cup of coffee that is smooth and low in acidity is produced by steeping coffee grounds in chilly water for a long time. What you will need to make cold-brew coffee is:
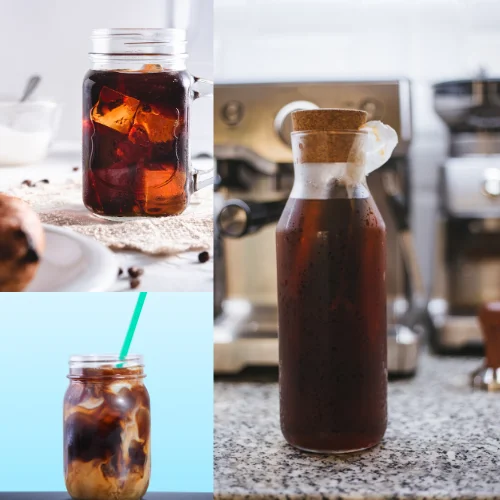
- A mason jar
- Ground coffee
- Chilly water
Instructions:
- Add ground coffee to the mason jar.
- Pour chilly water over the coffee grounds.
- Let the coffee steep in the refrigerator for 12-24 hours.
- Strain the coffee using a cheesecloth or coffee filter.
Step-5 Choose Water with care
When it comes to brewing coffee, water isn’t just an ingredient—it’s a key player in extracting the best flavors from your beans. Here’s how to get it right:
Water Temperature: The Goldilocks Zone
The temperature of your water has a significant impact on extraction.
- Too hot? You’ll over-extract, leading to bitter, harsh flavors.
- Too cold? Under-extraction results in a flat, dull cup.
For the perfect brew, aim for a water temperature between 195°F and 205°F (90°C to 96°C). This range gently coaxes the beans’ aromatic oils without burning them. Use a thermometer or invest in a kettle with temperature control to hit the sweet spot consistently. Trust us—this small detail can transform your coffee experience.
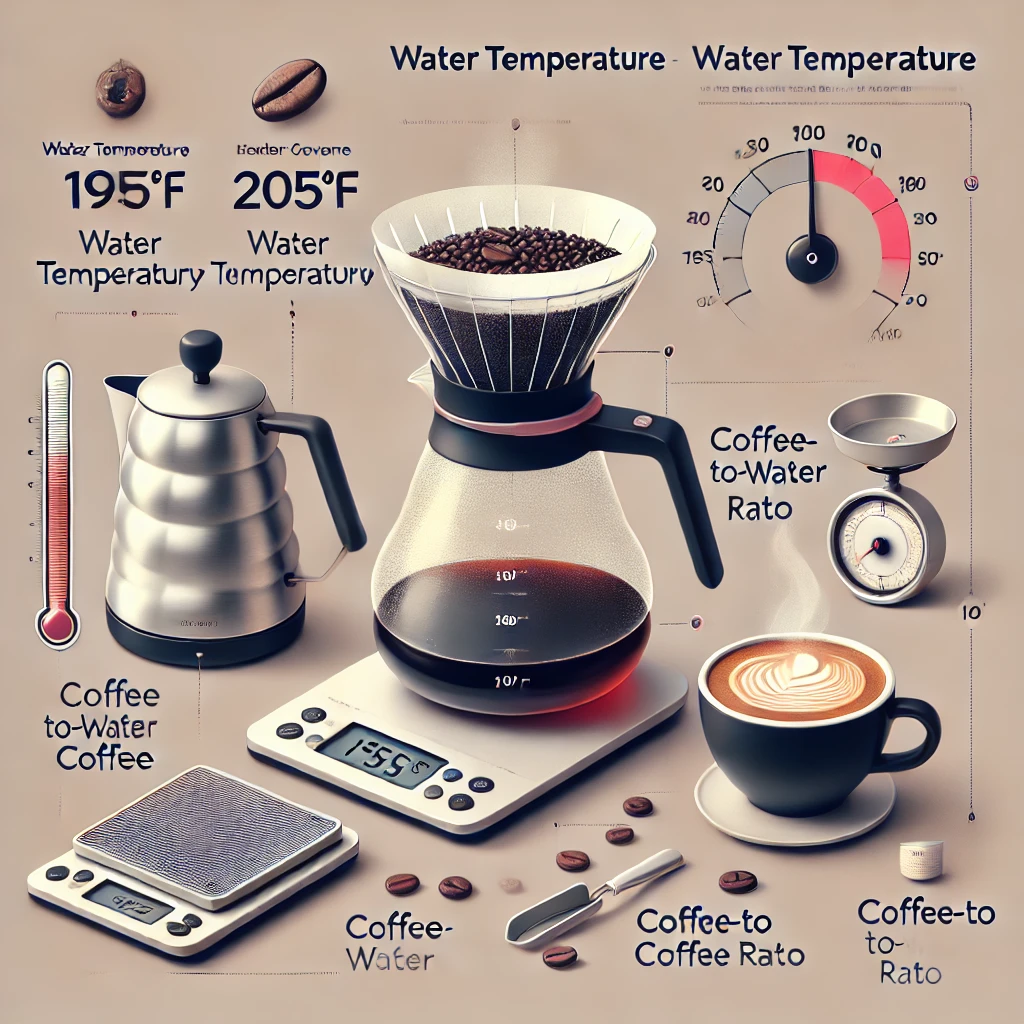
Water-to-Coffee Ratio: Finding Balance
The ratio of coffee to water determines your brew’s strength. Here’s a starting guide for popular methods:
- Pour-Over: A 1:15 coffee-to-water ratio is a good baseline (1g of coffee for every 15g of water).
- French Press or Moka Pot: Slightly stronger ratios of 1:12 or 1:14 work best.
For a standard 12 oz cup, use about 24g of coffee and 360g (12 oz) of water. Precision matters, so weighing your coffee and water with a kitchen scale ensures consistency. Once you find your ideal ratio, tweak it to suit your personal taste.
Mastering the right water temperature and ratio is your key to unlocking the perfect balance of flavor, body, and aroma. This step may seem minor, but it’s the difference between an average cup and a truly exceptional one!
Conclusion
At last, the moment you’ve been working toward—a sip that brings it all together. Let the flavors bloom on your palate and savor the satisfaction of crafting something truly exceptional. It’s a coffee triumph, a little celebration in a cup.
By focusing on the essentials—fresh, quality beans, a burr grinder, a simple brewing method, the right water temperature, and precise ratios—you can master the art of brewing coffee without needing fancy equipment.
Remember, it’s your technique and commitment to the process that make all the difference. With each cup, you’re not just making coffee—you’re honing a skill, exploring flavors, and embracing the joy of learning. Here’s to endless possibilities and better brews, one sip at a time!